Showing posts with label petticoat. Show all posts

Wednesday, October 5, 2016

• 1860s Underpinnings •


I must admit to being rather excited about today's post.  All of these fluffy white and pink things make my heart happy!!!  ;D

Since I acquired some new underpinnings semi-recently, I wanted to do a post showing the basics that I wear under my 1860s dresses. 


Starting with Layer #1, we have the drawers!  These were so fun and easy to make, and, well, quite funny too.  ;D  I used Simplicity 9769, just lengthening them by about 70 inches or so.  (Only a slight exaggeration.)


I had always been one for making the most boring, plain, blank-slate underpinnings.  No contrasts.  No lace.  No tucks.  Just make the thing in the quickest and easiest way possible so you can wear it.  Sarah, on the other hand, makes the prettiest things.  Long story short, she finally convinced me that it is actually worth it to take a little more time and effort and make pretty, frilly things.  And she is so right.  :)  Thanks for persuading me, Sarah!!!!!!!

I didn't have any wide lace for the legs of the drawers, so I opted for tucks, ruching, and narrower lace trim, inspired by this pair of original 1860s drawers.  I like the result, although obviously my tucks and such are bigger than the originals.  The main fabric is muslin.


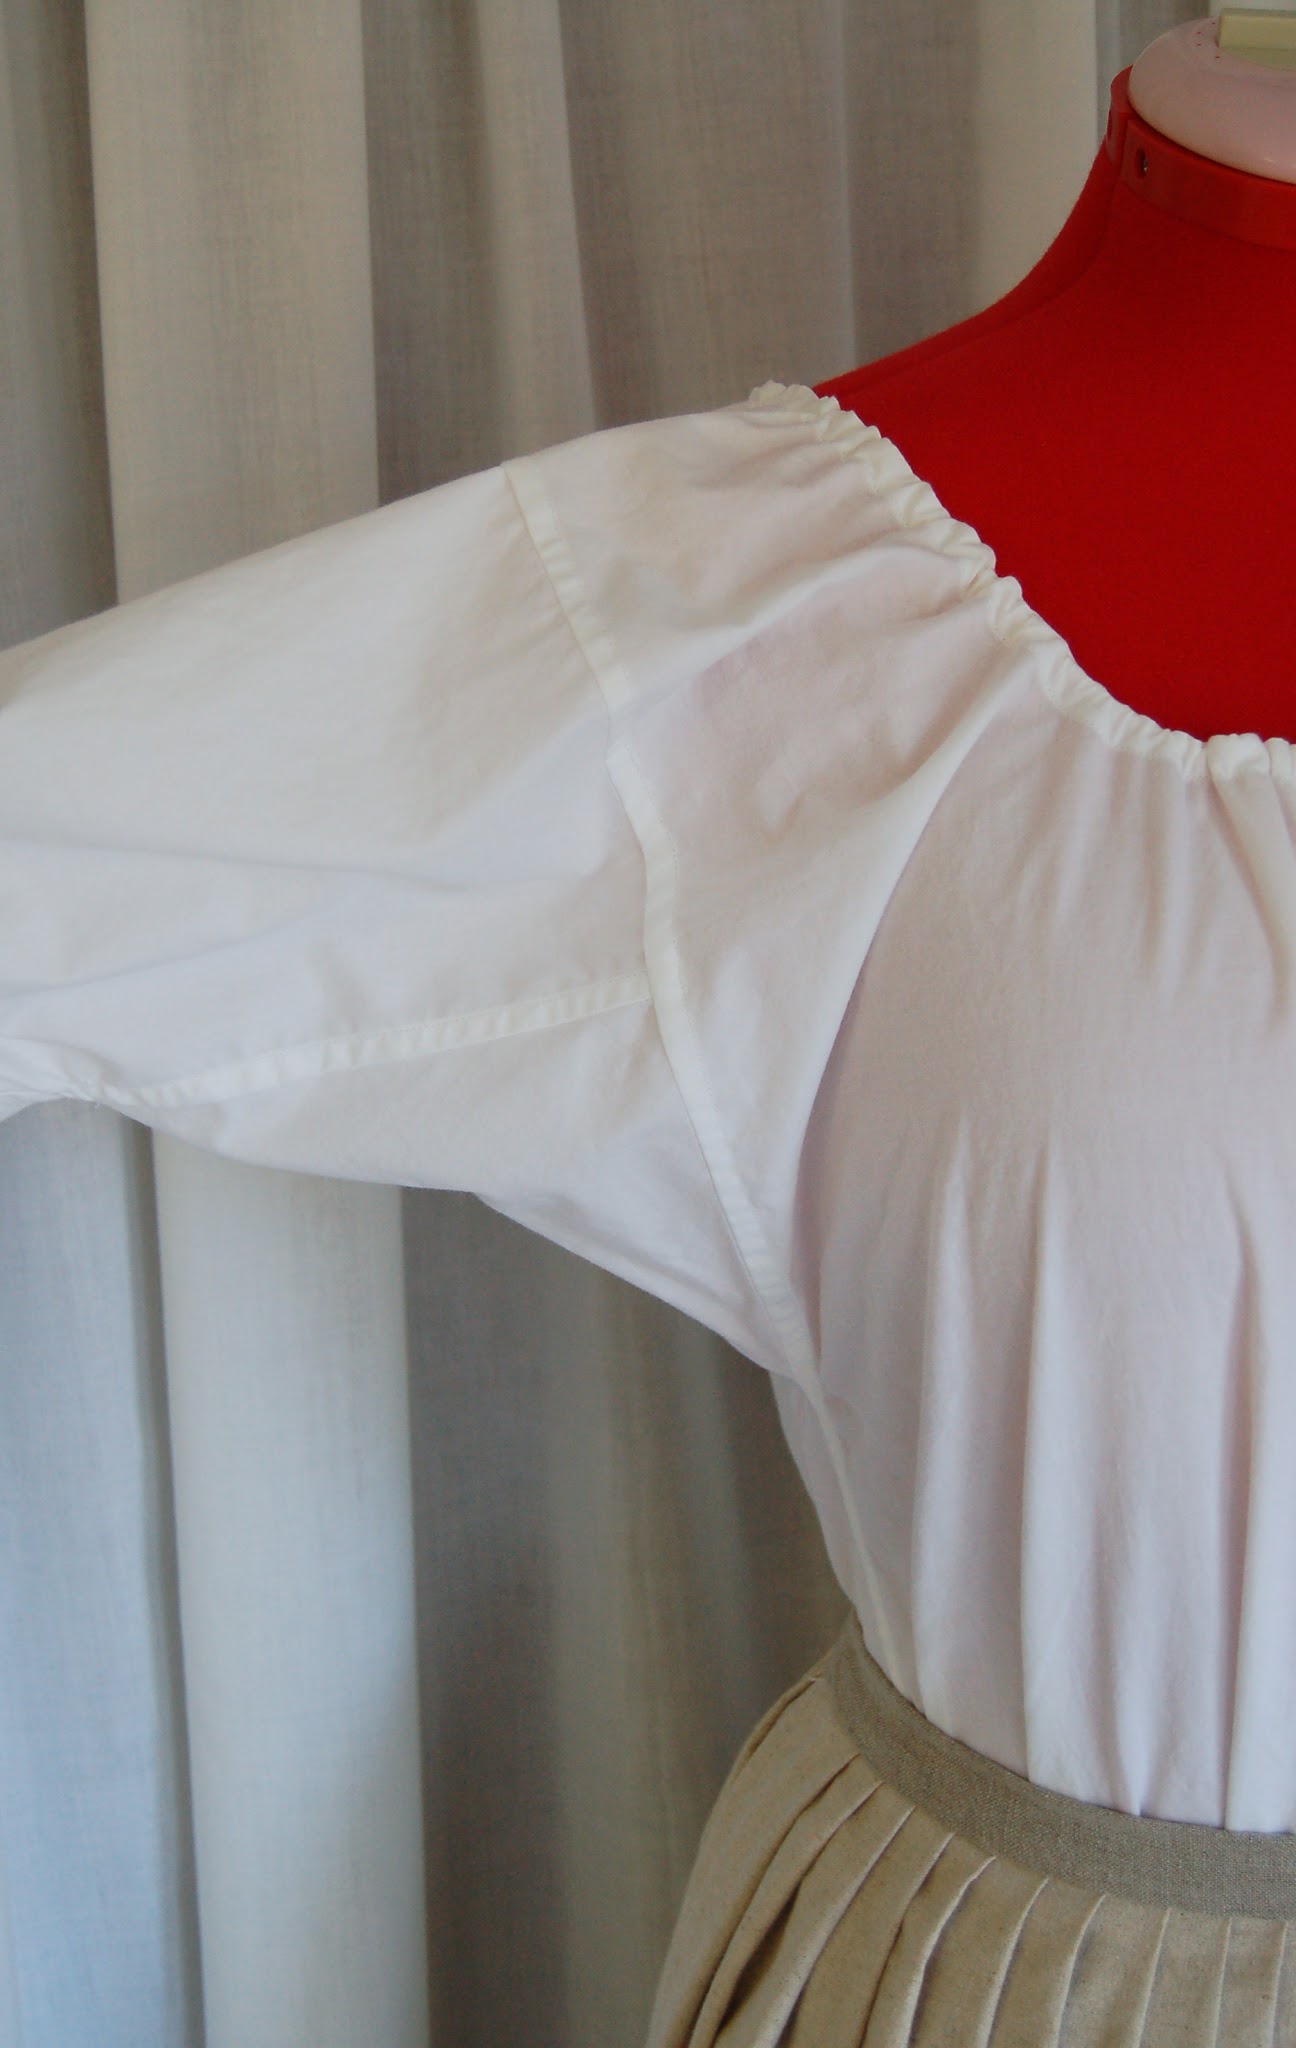
Layer #2 features my favorite piece of the whole ensemble: my new chemise that Sarah made for me!!  She was the sweetest and offered to whip me one up, which she did.  :)  Until now I wore my regency chemise with everything, but now I have a pretty, period-correct one to wear.  Thank you, Sarah!!  <3


This was also made from Simplicity 9769, out of fine, soft muslin, with quite a few alterations.  In short, the body is cut 5 sizes smaller than what I would normally wear, the yoke and shoulders 4 sizes smaller, and the body of the chemise lengthened about 70 inches, once again (that's almost for real in this case!).  Instead of the terribly constricting sleeves that came with the pattern (even when cut in the normal size!), she added gorgeous eyelet lace instead.  I love it that way!!  :)


The chemise is supposed to be an off-the-shoulder style, in order to accomodate a ball gown, but even for that style, the pattern is made very strangely.  When cut 4 sizes smaller, the yoke fit as it was supposed to - just grazing the shoulders.  If it was cut in the "correct" size, it would be falling right off.  Weird?!

In any case, since I don't plan on making any off-the-shoulder ball gowns any time soon (as in never!), a tuck was taken in the back, and the front was overlapped about 1-1/4" extra, so that it fit comfortably without falling off the shoulders.


Layer #3?  Corset!!  Made from Simplicity 9769 (I guess you could say we like that pattern!), it is made of quilting cotton and lined with tightly-woven pillow ticking.  After making a mockup, I found I needed to make it 3 sizes smaller than my standard size, and that worked just right.  Thelma Lou (our beloved dressform) has a totally different body shape than I do, and she's also a bit stiffer than I (haha!), so the stays don't fit her very well, but on me they lace up quite perfectly.  I almost want to make another pair, just for how fun and pretty they are!!  :)


I used straight steel boning, and omitted the center front busk (I know, weird), so it slips on easily over the head.  The eyelets in back are all hand-sewn.

I would love to try another corset pattern just for fun someday, to see how much waist reduction is actually possible.  But with this one I can get 2" reduction, max.  It is quite comfortable, although after a whole day of wearing it (especially with riding in the car), I get a very sore right hip.  It is still very comfortable, however, and I would highly recommend the pattern.


Now for Layer #4 - another top favorite!  :) 
I was planning a sheer Civil War dress earlier this year, and so needed a corset cover to wear beneath it.  I surprised everyone (including myself!) and bought two different laces to use on it; one intricate leaf-patterned cotton eyelet, and a very delicate cotton lace trim for edging.  The main fabric is cotton batiste.

Although there are many frillier ones out there than mine, I still just love it!


Inspired by this original corset cover, I made two tucked panels, sewed lace in between and on each edge of them, then sewed pieces of flat batiste on each side of that.  Once that was done, I cut out the actual shape of the corset cover.  I used the lining pieces from Butterick 5831 for the basic shape, altering it here and there as needed.  

Since the waistband needed to be fitted, I had to take two large darts on each side, and add a few gathers on each side of them.  It might be a little bit unorthodox, but it worked!


(Inside view)

All of the seams inside the corset cover are finished, and there isn't one stitch of serging!!!  I'm proud of myself!!!  ;)

I turned the seams next to the lace insets over themselves (sort of a flat-felled seam) and slip-stitched them in place invisibly.  The shoulder seams are french seams, as are the sides.


Probably my favorite part of the whole corset cover - the super fun side opening!!!  :D  This is the type of thing that I always dread in projects, even though they are not actually hard at all.

Thelma Lou's waist was too large for the waistband to be able to hook-and-eye together, but on me, it closes well.  There is a hook and eye at the armhole as well, and snaps in between. 


Layer #5 - underpetticoat!  This is my favorite petticoat by far, all full of tucks and cords.  Once again, it pales in comparison to other petticoats from the 1860s, and others that contemporary seamstresses have made, but for my level of patience, I love it.  ;)

On top of all of these layers would of course be a hoop skirt/crinoline, and an over-petticoat.  I didn't get a picture of either of these, but you can visualize it easily enough. 

I hope you enjoyed seeing these garments!  :)  Thanks for stopping by!

Also - if you haven't stopped by my Dolly Creates Etsy shop lately, I just listed several new garments and an apron that are all perfect for fall.  Hop over to my shop and check them out!


Follow Me on Pinterest

Friday, November 6, 2015

• 18th Century Sewing •


It has taken a long time for this to come about, but we're finally sewing 18th century garments!! At last!! 
Last month, Lily of Mode de Lis listed the JP Ryan stays pattern in her Etsy shop. It was the right size and a good price, so we bought it! It dawned on us shortly afterward that it would be fun to make colonial outfits for Thanksgiving, so we have since started working on our outfits, from the inside out (of course!).

Incidentally, the stays don't really look like anything on Thelma Lou, but that's because she just simply isn't cinch-able. 


We had a nice piece of striped ticking that worked great for the outside of our stays (the same fabric is used on my mom's stays). The "interfacing" of mine is linen; hers is cotton duck.

If you're my friend, you won't look too closely at the binding.....

The stays came together very easily, with the hardest part being sewing on the binding. I'm not exactly itching to make another pair of stays any time soon after that experience! I can only imagine how dreadful it would be to bind them with leather! Ugh!! My fingers would never forgive me if I tried something like that.

I really (really) didn't want to use reed at all for boning; the idea of having it break and having to replace it was NOT a good one to me. So I used 1/4" steel boning instead, and only boned a little over half of the corset. (That still ended up adding up to around 50 bones!) I put boning in next to all the seams, in the tabs, and other essential areas, and the rest was basically just in every other casing. I did sew boning casings all over the entire stays, however, because I found that it added a lot of stability.


I would definitely recommend purchasing the stays pattern one size smaller than your actual measurements. I did, and my stays lace up to within about 1 1/2-2" of each edge right off the bat.

I am a definite fan of this pattern though, as far as 18th century stays go! I absolutely love how the back extends much farther up in the back than the front. And the fact that they have no straps makes them actually practical to wear.

The fabric I lined my stays with is a reproduction quilting cotton (from 1855, incidentally, but it's pretty enough, I really don't care!). It's the same fabric as my garters and the lining of my reticule. You could say I like this fabric. :) In fact, I like it so much, I'm planning on getting more for an 1855 dress!


Eyelets! Their misshapen-ness gives them character. 
Right??! ;)


These first pictures show the stays and petticoat over my regency chemise; I hadn't sewn my colonial chemise yet when I took the pictures, so that's why.

In any case, the next layer is my plain gathered petticoat, which will be handy for several different eras!


My colonial chemise is made of muslin. We didn't have any linen on hand, or a place to buy it nearby, or the time to order it, or the inclination, so we just fudged it with muslin. It works for starters! 

I made it using my self-drafted chemise pattern (yes, I'm still prodigiously proud of myself for coming up with it, especially since I did so very early on in my sewing experience!). The sleeves have gussets, and all the seams are flat-felled.

The sleeves are ridiculously long in these pictures because they have not been hemmed yet. We figured it would make sense to wait until we have our jackets made so we can decide on the exact sleeve length we want. In the mean time though, they just look ridiculous! But that's fine! :)


I embroidered a pink "E" (a fancy one this time!) on the front, but this time I actually had a good excuse! My mom's chemise is exactly the same, so we had to have something to differentiate between the two. Hers, of course, has "Mom" embroidered in blue on the front. ;)


Ahh! The petticoat! I have had this thing partially assembled for....a long time. About a year, in fact! Evidence that I've been wanting to sew 18th century outfits for ages! :)

I had to redo the pleats at the waist though, because the original ones I had made were too big. I seem to have a mental block for figuring out pleats, so I'm always just trying to guess at how big and far apart to make them. Luckily for me, my first guess was the right one! Score!! :)

The petticoat is made out of linen, very nice quality linen, as a matter of fact! It's very nice and thick but also has a nice fine weave. It is about 135" around (equivalent to 3 widths of fabric), but cut crosswise so I could just seam it at the sides for pocket openings. And the 45" width of the fabric makes for the perfect length petticoat once it's hemmed! (No, neither of the petticoats are hemmed....just in case you were wondering!)

(Yes, Thelma Lou's stays disappeared! I didn't feel like taking the laces out just to fit them over her again, so she went without this time) 


The front pleats are pleated towards the center, while the back pleats go the opposite direction. The waistband is also linen, but a different, heavier weave than the main fabric. 


The way 18th century petticoats tie at the waist is so fun! I love how adjustable they are.

Incidentally, since I took these pictures, I started tossing around ideas for a bum roll, and tried socks, as Lily suggested. I really love how it looks! It adds just enough volume to look good, without being as voluminous as a freight train! ;)

On a side note, I didn't forget about hanging pockets! I'm working on embroidering mine, but haven't finished yet. Actually, I'm only on the first one, and I'm still trying to find a legitimate excuse to leave one of them un-embroidered. I haven't come up with anything yet. ;) I enjoy the embroidery, but it's the freehand drawing-on of the pattern that is not my favorite pastime. 


This cap is....rather unorthodox. I used the Kannik's Korner cap pattern, but unfortunately chose some rather too heavy linen to make it. By the time I was half done, I knew it wasn't going to work very well, so I decided to just go ahead and finish it on the machine. It turned out fairly well, considering, and it will work until I find some suitable cap fabric. It's fun to wear, even if it isn't made right! :) And it stays on miraculously well! The only problem is trying to smash my hair into submission under there!


Confession time; I am guilty of committing the ultimate trespass any seamstress can commit. 
I bought a cloak! Dreadful, isn't it!! ;)
I wanted a cloak really bad, but after searching high and low for wool, I decided that it would be cheaper to just buy one than to make one. So I went ahead and purchased the Short Cape from Jas. Townsend. I am very happy with it! The 24" long description makes it sound *so* short, but it is actually the perfect length, and much longer than one would imagine! It falls right at wrist length, which is ideal for being able to still do things without fighting the cloak. AND, it's SO soft and warm.


It has a lovely little collar, and the most beautiful pewter clasp. Jas. Townsend makes their own pewter clasps, in fact! Bonus! :)


It is lined with coordinating blue cotton. I was reading this article about cloaks while I was researching them, and I found it very helpful! Although there aren't very many things niftier than a long cloak, the shorter length really is more practical! And just like the article says, you can swing the front edges back over your shoulders if you get too warm without being strangled. And avoiding strangulation is always nice! ;) 

Ever since I bought my cloak, I've been suffering from a severe case of cloak addiction. So much so, in fact, that I took out a UFO skirt I had in the drawer of shame and refashioned it into a cloak! I can't wait to share photos of that, but I'm determined to wait for a suitably snowy background to take pictures. And at 60-70 degrees, that's not likely to happen just yet. 

I hope you enjoyed this post! :) We're having a blast sewing these outfits. And we can't wait to get started on our jackets....whenever the pattern gets here!

Follow Me on Pinterest

Friday, November 14, 2014

HSF #21: "La Cage"


Well, it's not actually a "cage." It is a corded petticoat! With all of my upcoming 1860s-ish sewing, I needed some volume going on. I'm not going to do a hoopskirt, not only because I don't have one, but just because...yeah. They're big.
So, I read up on corded petticoats, did some figuring, and whipped up my own! It was a breeze to sew, and is excitingly voluminous!

The Challenge: Re-do. I chose to "re-do" HSF challenge #12, which was "Shape and Support."
Fabric: Ava-lon muslin, 3.5 yards
Pattern: Self-drafted
Year: 1830-60
Notions: 20 yards of cording, thread, buttons
How historically accurate is it? Very, other than the fact that it is machine-sewn.
Hours to complete: 8-ish
First worn: Never!
Total cost: $34

This was a very easy project to make, with the time-consuming part being sewing in all that cording. I just cut two widths of fabric 54" long, gathered them up, added a placket, waistband, then marked my hem and chopped it off evenly. I allowed 4 1/2" for the hem so that it would fall in between the second and third rows of cording. Then I started in on the cording, beginning at the bottom, and working my way up. I would definitely recommend a corded petticoat for a hoop-wary historical seamstress.


The lovely blue lines are proof that I just finished it! That is the reason for my late-in-the-day post. 


I used 5/32" cording, which really seems to be the perfect size! It's stable without being stiff.


Confession time: I still have to sew on the buttons! It will be done soon though, I promise.

I'll be back next week with an outfit post!
Visit the blog live to leave a comment

Follow Me on Pinterest

Monday, August 25, 2014

• A Regency Petticoat •


A while back I was planning on making a Regency bodiced petticoat, but I decided that for now, an un-bodiced one would be much more practical. I had some really lovely muslin, so I finally decided to whip up a petticoat. I used the Simplicity 4055 skirt front piece for the front, making the edges go straight in rather than curving in and back out. For the back, I just cut a piece the width of the fabric, and as long as I wanted it. 
There are four big pleats in the back, and four tiny ones in the front. I also added a placket and put on a waistband with a tab closure.
Originally, I was planning on putting in four rows of cording, but finally decided that I wanted ruffles instead. They look so cute peeking out from underneath the dress, like in this picture:

I made a 2" ruffle out of a double layer of fabric so that it would be stiff, and I wouldn't have to hem it! The hardest part of the whole petticoat was gathering up all that ruffle! Other than that though, it was a fast and easy project.
And even though it's a Regency petticoat, I can totally see wearing it with Victorian and Edwardian styles as well.


Front

Back


Inside view of ruffle. (I know....they didn't have sergers in 1814. Oh well.)
~~~~~~~~~~~
Other sewing room news:
I've got buttons coming for my spencer jacket, so that should finally be done by this weekend.
We're sewing fast and furious in preparation for a fall vacation. Long sleeved 1950s dresses, plaid half circle skirts, Regency dresses, all kinds of goodies. I can't wait to share them with you!
Visit the blog live to leave a comment!


Follow Me on Pinterest