Monday, July 27, 2015

• Accessorizing My 1930s Dress •


A couple of weeks ago, Lily of Mode de Lis posted about her 1930s pocket tutorial. To say I loved it would have been an understatement!! It's so cute, and the absolute perfect addition to pretty much any '30s dress. It occurred to me that my 1930s dress needed just such an addition! I liked how it looked without the pocket, and yet it really needed an extra dose of '30s goodness.


So, I made a pocket! The tutorial is very easy to follow, and it couldn't be easier to make!


This was quite the revamp of my dress; I needed to take some extra length out of the back since it was a little bit too long in the waist. I unpicked the seam and basted it up several different times before I got it to be the right length. I ended up taking the skirt up 2 inches in the back! Goodness! And the amazing part is, it didn't effect the hem. 

So now, not only is my dress cuter, but it actually fits right! No more pesky reaching-behind-the-back-to-adjust-the-belt! I'm so happy to finally have this be the super-comfortable, wear-it-every-single-day kind of dress.


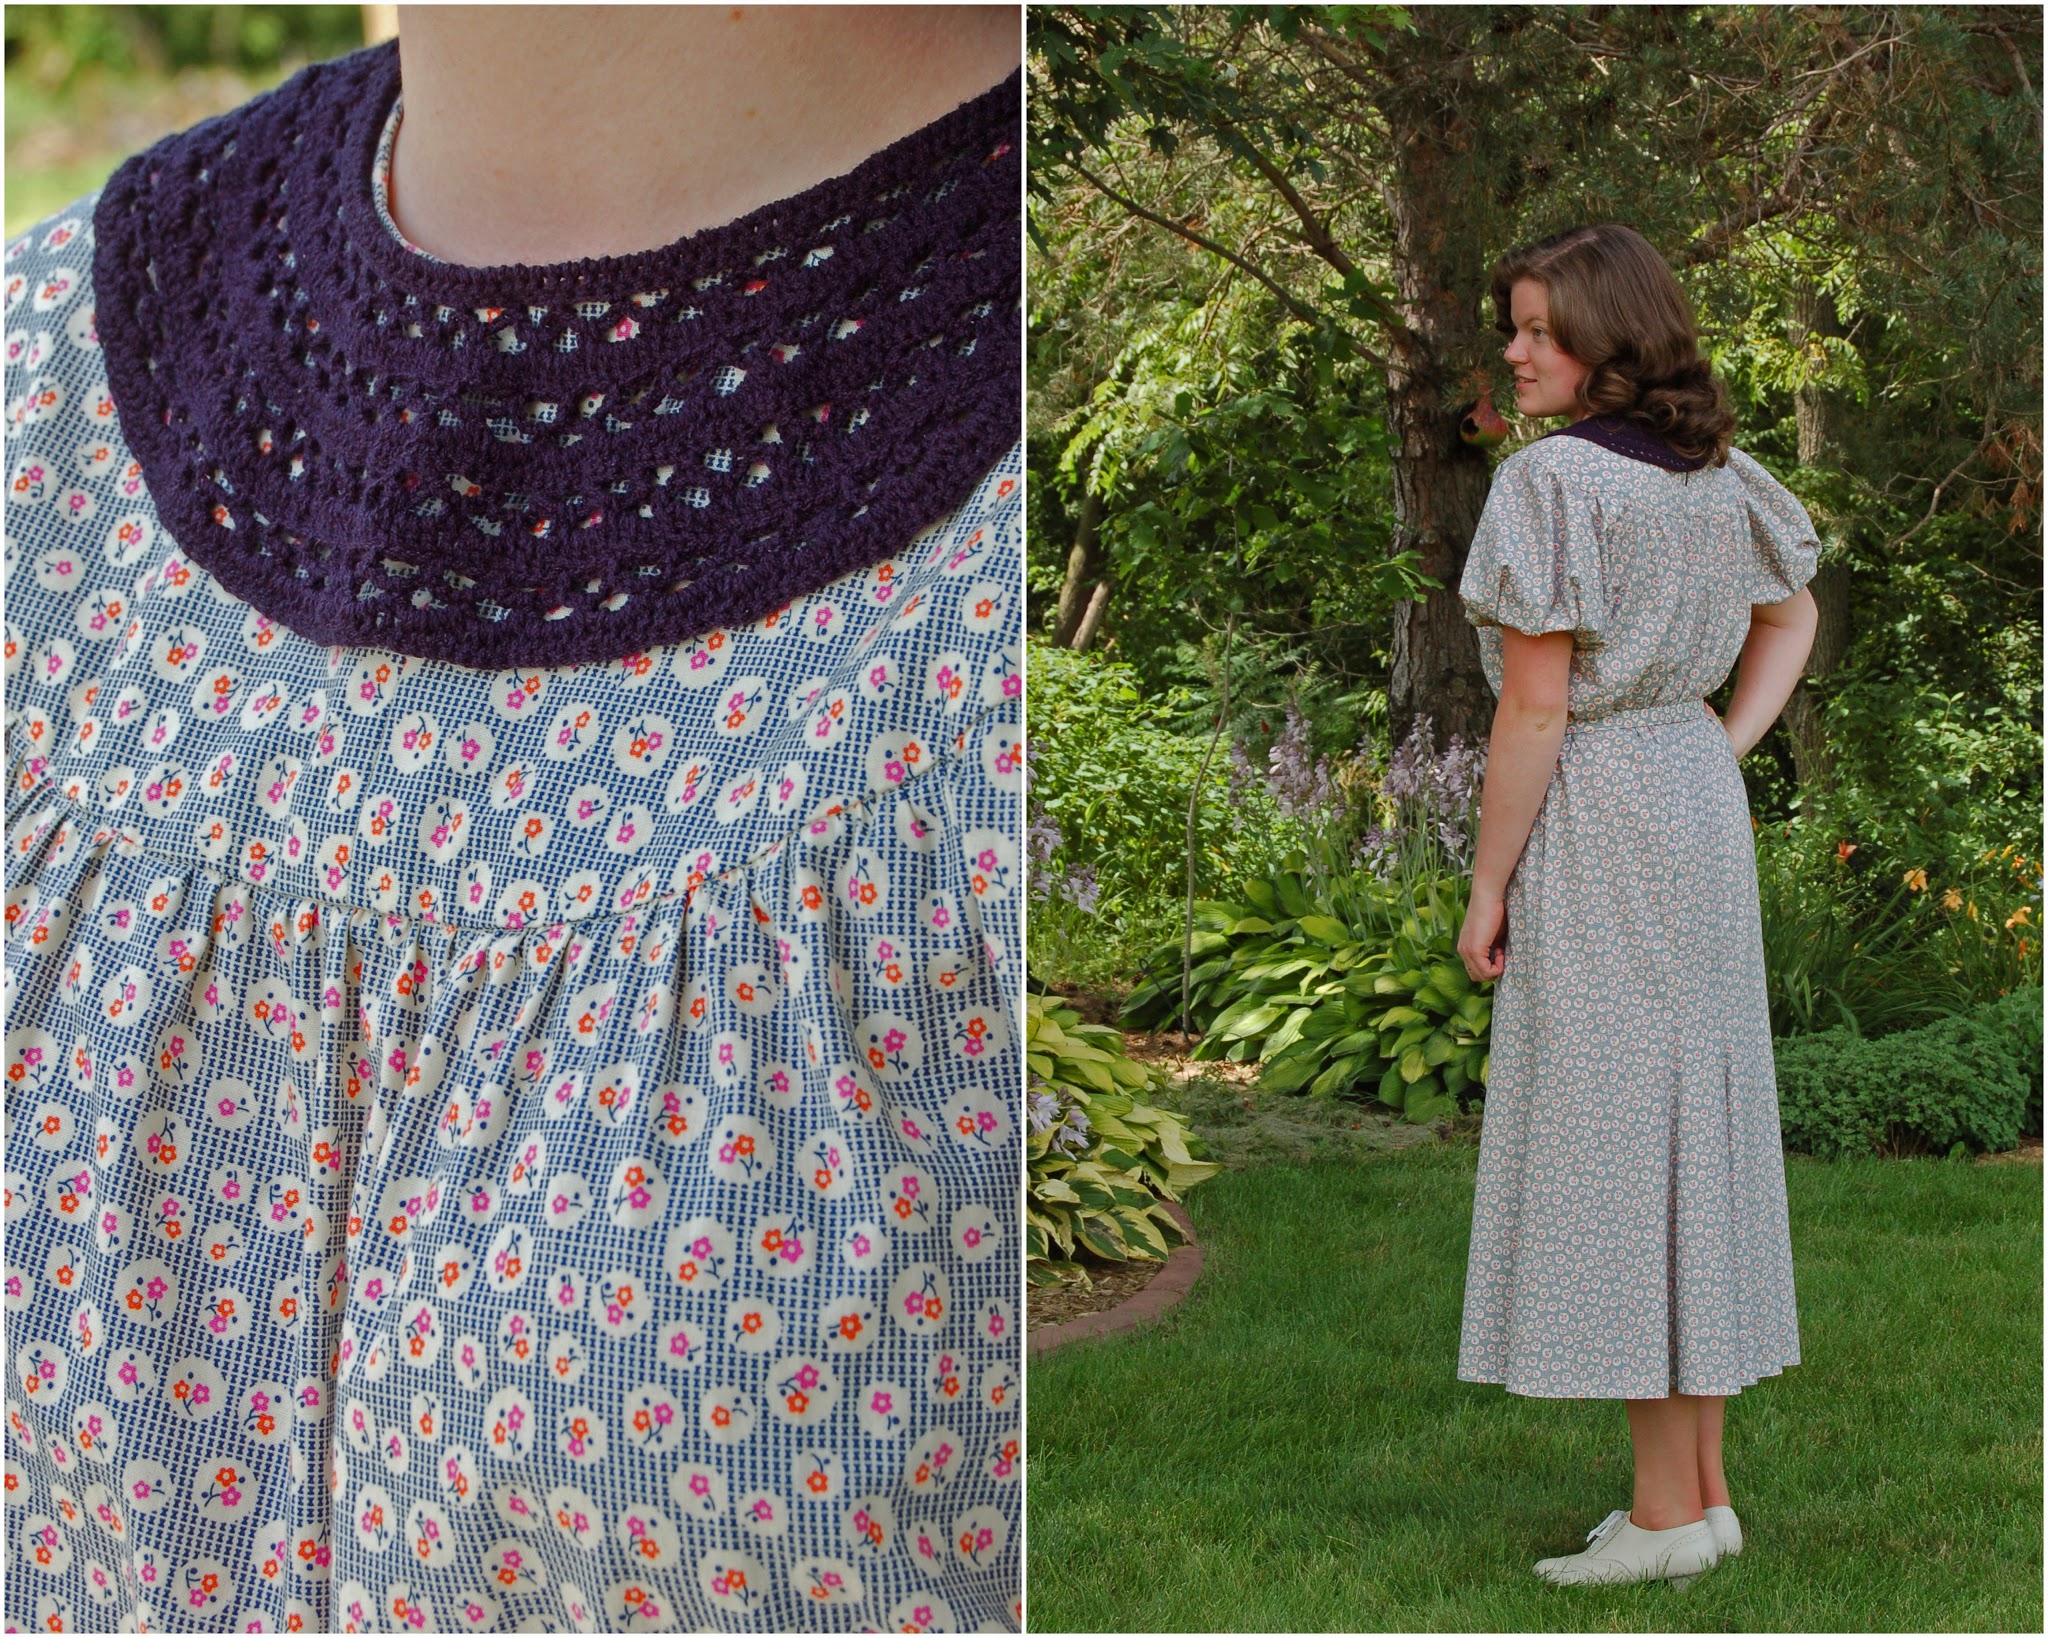
I wear my crocheted collar from the Clarks ONT Fashions pattern book with the dress. And I'm actually currently crocheting the cape from that same pattern book to wear with this outfit.
So I guess you might end up being stuck seeing this dress a third time! 
;)


This pocket happens to qualify for this month's HSM!

The Challenge: Accessorize

Fabric: Leftover cotton from my dress, plus 1/8 yard navy blue cotton for the contrast

Pattern: Pocket Tutorial by Mode de Lis on the Penny Rose Fabrics Blog

Year: 1929-30

Notions: Thread

How historically accurate is it? 100%

Hours to complete: 15 minutes

First worn: Last week to church

Total cost: $1.17

Thanks ever so much to the amazing Lily for coming up with this adorable pocket tutorial! It's a definite keeper, and I can't wait to use it again!
Follow Me on Pinterest

Friday, July 24, 2015

• A Peek into the Past •

I was looking at the HSM page yesterday, and noticed that next month's challenge is Heirlooms and Heritage. Inspired, I decided to finally take a dig into some of our old pictures for inspiration!
These are pictures from my mom's side of the family; we don't have many pictures from my dad's side of the family from way back. I'll have to ask my Grandma for some! :)


This is my great-grandma Cecilia, who died when I was about 2 years old. She was born in 1905, so she was probably 3 or 4 in this picture. 
(Notice the deep hem on her dress!)


This is my other great-grandparents on their wedding day in 1914. Anton was born in 1889 and Clara was born in 1896. They both died before I was born.
Isn't her dress amazing?!! It's so wonderfully fluffy and intricate.


This is my grandma, who was born in 1925. This picture has no date, but it looks suspiciously like a graduation picture, making the date around 1943.
This is definitely my favorite picture of her; look at that hair!


My grandma and grandpa on their wedding day in September of 1945. They wore matching suits (rather than a dress on my grandma), no doubt because of the shortages due to the war.

Grandpa and Grandma owned a photo studio for years, so we have quite a few photos of them and their family from over the years, and they're very good quality.


Here they are with my aunt in late 1946. Notice they are wearing their wedding suits again!


Christmas, 1946.


Four generations! The lovely lady on the right was my grandma's sister.
(There's Grandma's wedding suit again.)


And now for cuteness overload.
My mom! Wasn't she the cutest little girl EVER?
Yep, she was.
And I happen to have a vintage pattern for a little girl dress that looks exactly like this. I can't wait to make one! :)


My grandma (far right) with her parents and siblings in the mid-late 1950s. Isn't my grandma's dress lovely? I see a petticoat! And I just >love< great-grandma's shoes!


And lastly, here is the same set of great-grandparents standing in front of their house in the late 1950s. 
Great-grandpa died just four months after their 60th wedding anniversary in 1974. 

~

I hope you enjoyed these pictures! I just love looking at old photographs, even when they're not of my own family. There's so much to look at!
And after studying these pictures for a while, I think I know what I'll be making for next month's HSM! I won't entirely give my plan away, but it has something to do with a suit.... ;)
Follow Me on Pinterest

Monday, July 20, 2015

My First Vintage Piece • Kerrybrooke 1950s Dress

*EDIT: This dress is now for sale in my Etsy shop.  See the listing here.*
~~~~~~~~~~~


I'm very excited about today's post! This is my one and only (so far, at least) vintage garment!

It is a Kerrybrooke dress by Sears Roebuck & Co. from the 1950s; I'm not sure of the exact date of manufacture.
Just as a side note, Sears has come a long ways since those days, don't you think?


Juniors' fashions now versus during the 1940s.
'Nuff said.

Back to my dress, however, I bought it a couple of months ago from A Doe A Deer; she was having an Instasale, and as soon as I saw this dress, I couldn't resist it. It was actually long enough, a super cute style, and the price? Amazing! $20 shipped. You just about can't beat that.


I was very excited to receive it! I washed it up, hung it out to dry, and then tried it on.
Hmm.
One little-bitty measurement I forgot to ask about was the back-waist length; it was only about 3 inches short. After discovering that fact, I was sure I couldn't wear it; there wasn't enough of a waist-skirt seam to let out. I was disappointed of course, but still glad to at least own a "real" 1950s dress.

Fast-forward to last week, when I decided to try on the dress again just for fun. Suddenly I had the thought of making a wide waistband/belt that would cover up the too-short bodice. I went to the fabric store, found some matching fabric, and made one! 

It ended up being the most wonderful idea! You can't even tell that the waist is too short, and I rather like the green accent at the waist. I am so thankful that I actually get to wear my "real" 1950s dress! :)


The details are just lovely; the pintucks in the front, the buttons, and look at the sleeves! I can't wait to use that sort of cuff on one of my dresses!


I don't know what kind of fabric the dress is made of, but thankfully it does wash and iron up perfectly. It also doesn't wrinkle! Bonus!!

The dress was originally slightly short for me, but it had about a 2" hem, which allowed me to bring it down to the perfect length.


We were at the antique shop last week, and lo and behold, there was a card of these exact same buttons for sale. Yes! We bought them!! Now I can add an extra button at the top of the bodice (it's pinned in these pictures), and have extras in case I lose one.
That was such an amazing find. Thank you, Lord!!

I'm very happy with my dress, and excited to be able to wear it! It's not often that I even see a vintage dress in an antique store around here, so when you add the length factor, and the fact that I really don't like to spend a lot of money on one thing, it's hard to find a dress that works for me!


If you haven't stopped by my Etsy shop lately, do check out this skirt I just listed last week! It's the most lovely 1930s/40s/early 50s design, plus I will hem it to your desired length for no extra charge! The fabric is a lovely non-wrinkle polyester, so you really can't go wrong with it! ;)
Check it out here.

Follow Me on Pinterest

Monday, July 13, 2015

• Pink 1940s Shirtdress •


Several weeks ago we had a little dress-photography-outing, so I have been deeply enjoying being able to have photos ready for posting each week!
This dress of my mom's is another top favorite of mine. It is simply gorgeous, and the fabric is perfect for summer! 


As with her rose chintz dress, she used Simplicity 3847 for the bodice, adding tucks front and back for a more fitted style. The skirt is from Simplicity 3688.


I just love the fabric! I have a definite weakness for tiny florals, and this is no exception.


The train station in town has ended up being an ideal backdrop for photos! The back yard can get a little monotonous at times, so it's nice to have a little change of scenery.


My mom happened to have these >gorgeous< buttons in her stash (oh, to have such a button stash!), and they were the perfect match for her fabric. This jelly-red buckle was the perfect accent!


The skirt of the dress is lined, which really adds comfort and wonderful body.


And lastly, a photo from one of our antiquing forays! That particular town had a lovely courthouse, which just happened to be decked out in patriotic decor, so it made for some lovely pictures.

Since the new Vintage Vogue patterns for fall came out, I've been getting the itch to start planning for a fall wardrobe. I can't wait to get to the fabric store! :) Wool dresses, wool skirts, and some lovely 3/4 sleeve blouses are on the sewing itinerary.

Thank you all for your lovely and encouraging comments on last week's post! You're all so sweet, as always, and I appreciate every one of you. :)

Follow Me on Pinterest

Monday, July 6, 2015

• Striped 1940s Frock •


You might just recognize that fabric, right? It's the keyhole tutorial dress! :)
Several weeks back, while perusing Pinterest for sewing inspiration, I spotted an absolutely adorable dress on a 1940s pattern cover. It is so pretty!

Pattern for sale here.
I had this green striped material in my stash (to make bathroom curtains, no less), but it really was the perfect choice to make into this dress. My mom also had a couple of yards of the fabric, and was gracious enough to let me have how much more I needed. Thanks, Mom!!!


I used Simplicity 3688 (one of my new favorite patterns!) for the bodice and sleeves, cutting the yoke crosswise to look like the original pattern picture. The bottom of the bodice is gathered onto a waistband rather than tucked.
I also cut the back bodice on the fold and made a faced keyhole opening, as you know from the tutorial.


I always shudder at the thought of fitting a waistband, whether it be on a dress or skirt, but I managed to get this one just right nevertheless. There's something *so* comfortable and fun about wearing a dress without a belt!


Since the back shoulder measurement was slightly narrow for me, I made it slightly wider and eased it onto the front shoulder. That's definitely one of my favorite fitting tricks!


For the neckline, I simply cut it square rather than round, but making sure that the front of the neckline was markedly narrower than the shoulder area. I didn't care to repeat my redo dress experience! Thankfully, there isn't a bit of neckline-gaping on this one.


The back bodice is gathered evenly across the back, whereas the front has concentrated gathers that are even with the gathers at the top of the bodice.


I really love this dress, and am happy with how it came out! It was very fast and easy to sew too, so maybe I need to make that other view with the floral fabric and lace.... ;)

I've been on a vintage kids' clothes sewing binge lately, so you'll be seeing some of that soon (Friday posts again!). There's just nothing on earth cuter than little vintage baby clothes. Period. ;)

If you haven't checked them out yet, be sure to take a look at the Miss L Fire shoes for sale on the blog here.
Follow Me on Pinterest