Tuesday, January 2, 2018

• A Day in the Year 1812 •


I think I have officially set a new record in the area of blog neglect!  It has been a crazy, wild, stressful, eventful, heartbreaking, amazing 10 months or so.  Since I last posted (in March!!), I changed jobs from being a home seamstress for a local historical reproduction company to being a customer service rep at a local pharmacy/home medical provider.  Needless to say, working full time definitely cuts into sewing time, but I'm looking forward to sewing up some great winter separates as I have time, and hopefully will be able to blog about them too!

In any case, today I'm sharing some pictures from an 1812 event we went to back in October.  It was an absolute blast, and the amount of reenactors that were there was incredible!


There was lovely period music being played all over the place.  Sounded delightful!


One gentleman had the most incredible carved gourds for sale.  The artwork was just amazing!


So many ladies in beautiful outfits!!!  :) 


I kind of wanted all of these hats, but unfortunately didn't get any of them.  Great inspiration though for "someday"!


That little number on the left with the pheasant feathers reminds me of Miss Pole in Cranford!  :) 


The battle is beginning!!


There were SO MANY soldiers, it was crazy.  The battle was noisy and glorious!


Later in the day there was another battle on the river.


All the mommas with their little babies melted my heart <3


My mom whipped up her first regency dress the week of the event, and it came out so good!  She looked absolutely gorgeous.


I helped her out by trimming her bonnet for her.  I used a picture of an extant 1810s bonnet for inspiration.


I love the little bow detail on the back of the bonnet.


She used Simplicity 4055 as a base for her dress, and modified it to fit her liking.  It closes in the back with drawstrings, and we just pinned it shut for the time being, since we did not have time to sew on the hooks and eyes.


I had plans to make a new regency ensemble, but didn't have time, so just wore my trusty calico regency gown, this time without the undersleeves, since it was HOT out.  


I had purchased a pretty block-printed scarf at the same event a couple of years ago, so paired it with my dress for a slightly different look.  

I had drafted this post about a month and a half ago (LOL!), and just now am getting around to posting it.  I'm excited to report that over this past weekend, I dove right into sewing a UFO 1930s dress that I've had sitting around in a sad pile for over a YEAR, finished it, and started into several other projects!  I had been in a major sewing funk for 3-4 months, and got to the point of having thoughts of selling my fabric and just giving up on the whole idea of sewing.  I just could not get into the mood, or make up my mind what to make or anything, but I FINALLY got over that, and it feels AMAZING.  I'm super excited to sew up all sorts of fun things for not just myself but family and friends as well!  I'm feeling very encouraged about the new year and what it may be bringing.  Lots of sewing, becoming an "adopted" aunt to two precious new babies, and whatever else the Lord brings my way.  Happy New Year to all of you!  <3

Follow Me on Pinterest

Thursday, March 16, 2017

• 1950s Projects •


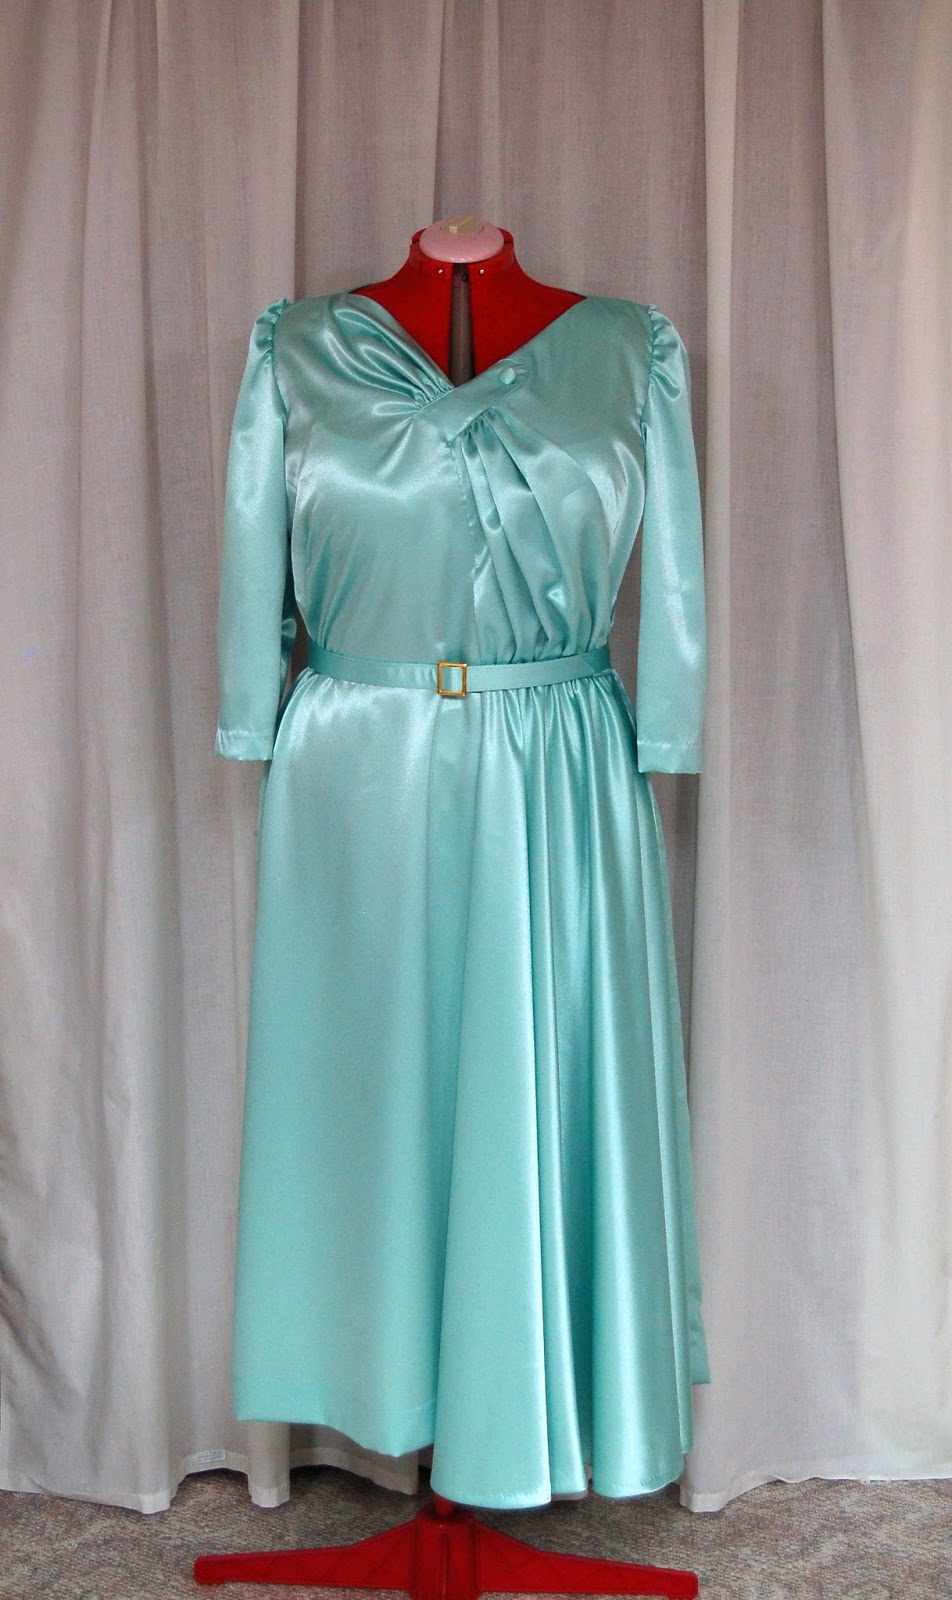
Today I thought I'd share a few projects that I made towards the end of last year for different folks!  This first one was a custom order in my Etsy shop for a lady who was going on a vacation to Europe, and wanted a vintage-style formal gown to wear to a performance of Swan Lake that she was attending in Paris, on Christmas Eve!  The dress has been referred to as "The Swan Lake Dress" ever since.  ;)


I was halfway scared out of my wits to make such a dress, out of satin, in what appeared to be a complex pattern (Vogue 8850), for someone else, just based on their measurements, but it ended up being a pretty easy task!  The pattern is actually quite fun to make, and the satin was not nearly as difficult to work with as I expected.


My customer chose this gorgeous seafoam green crepe-backed satin for her dress, and I *love* the color.  Positively gorgeous!

The only major change I made to the dress was the sleeves; the ones that come with the pattern are very fitted in the upper arm as-is, so I believe I cut the sleeve on a larger size, and then tapered the seams down to the appropriate measurement at the forearm.


Hand-picked zipper!  This picture makes it look all bunchy, but it really was not in person. 


A really fun aspect of this dress is the skirt overlay, which actually hangs about 2" below the skirt hem!


It is a quarter circle, gathered on top, and ideally rolled-hemmed by hand all the way around (nope, didn't do it - just ironed under the edge twice and slip-stitched), and then tacked to itself on the underside so it lays just right.  It's so nifty!!


The top gathers are part of the right bodice piece, but the gathers on the lower part of the bodice are a separate piece that is gathered on both ends and blind-stitched down on the edges.  The button tab is also cut in one with the right bodice piece.


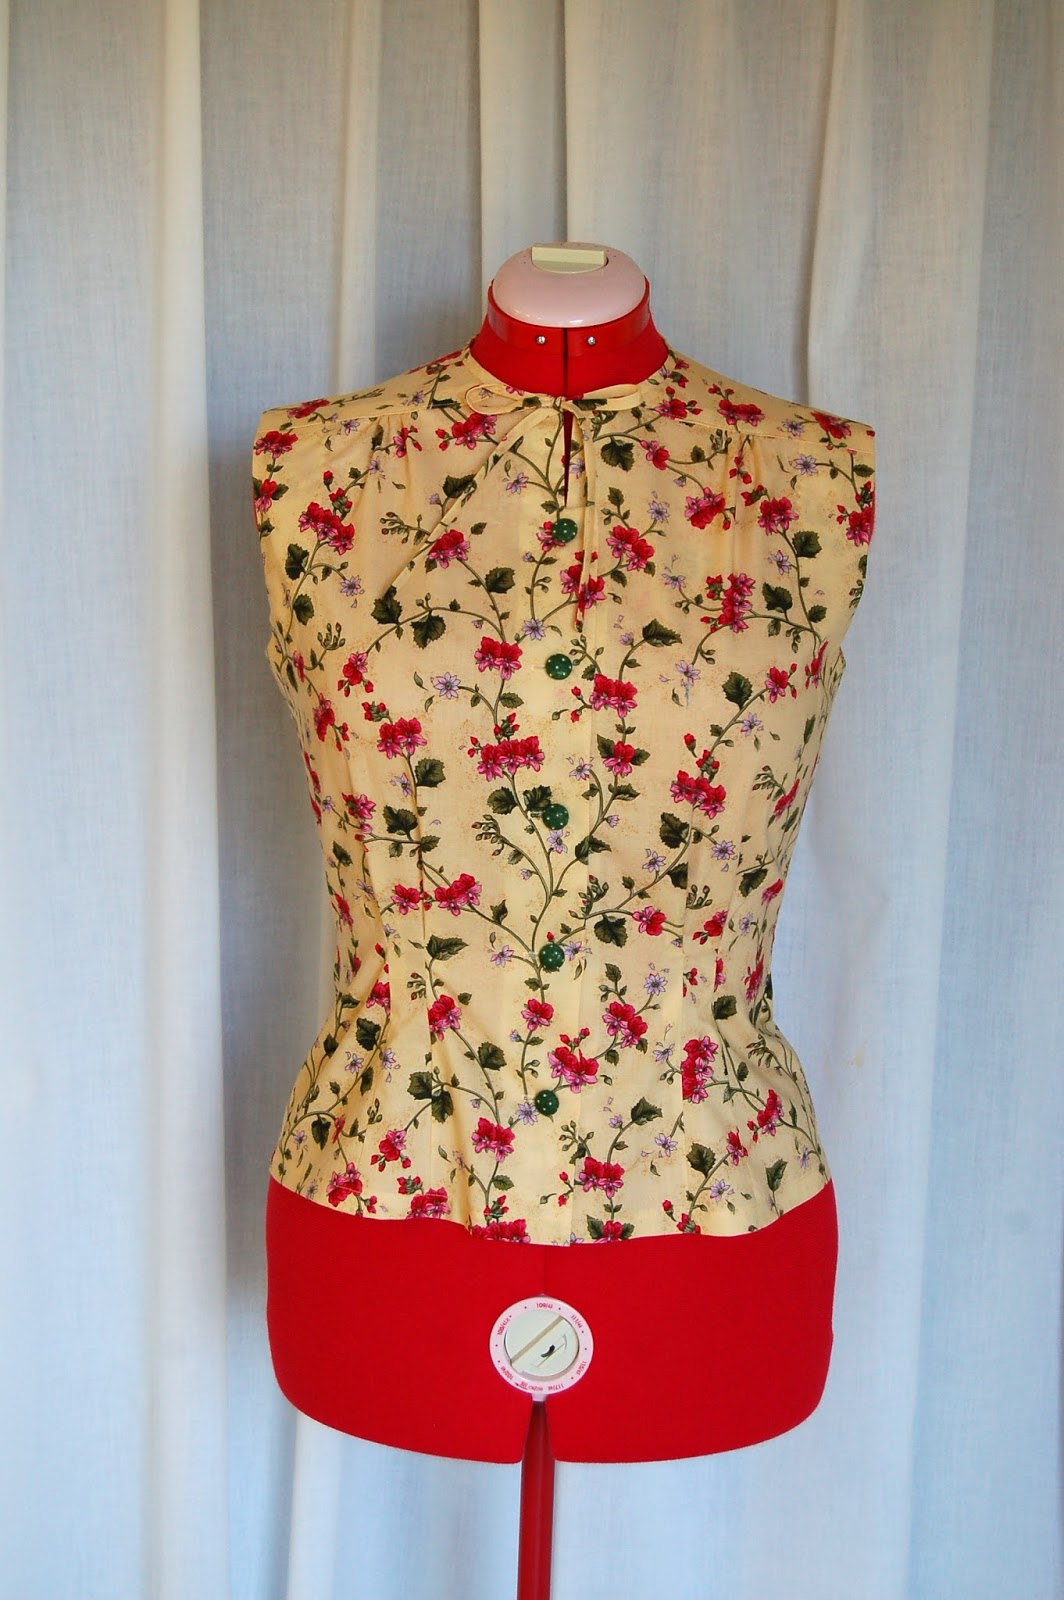
Next up is this cute '50s blouse that I made for a friend last summer.  I had gotten the fabric on sale shortly beforehand, and it seemed like just the right print for her.  I used a vintage blouse pattern in my stash, and whipped it up in no time.


I love the details of the blouse, especially the neckline with bow!!  It was a bit of a trick to do that narrow of binding around the neck, and then to turn the ties afterwards, but it came out good, thankfully.

Can I just say, YAY for pattern-matching?  ;)


Covered buttons are always a good thing.  ;)  I also made a vintage-style tie scarf to go with the blouse out of the green polka dot fabric.


Another *yay* for armhole facings!!  So much easier than bias, and it lays much more smoothly when it's finished.


This dress was for the same lady, also from an original 1950s pattern.  My mom cut out the dress, seeing as she is the pattern-matching master in the house, and I did the sewing.  ;)  She did a smashing job of it too!


I love the style of this dress - it's such a classic style of vintage housedress.  The front just closes with a zipper that extends below the waist, so it's easy on-and-off!


And that's all for today, except to say that there is a SALE going on in my Etsy shop right now!  Use the coupon code WINTERSEND to save 20% off your purchase, now through Monday, March 20th.  Check out the shop now!


Follow Me on Pinterest

Thursday, February 23, 2017

• Spring 1950s Separates •


Whew, it has been a crazy couple of months, or weeks, or whatever it has been since I last blogged!  :-O  Time is flying by, life is somewhat crazy, sorrows and emotions come on at the strangest moments, but all in all the Lord is good.  He continues to uphold us and carry us through in a miraculous way.

Now for today's post; we have had downright glorious weather here of late, so the other day we finally broke down and went out for some photos!  It was wonderful to be in short sleeves and *sandals* and be just the right temperature!  And I can't say I was unhappy about the clouds - they prevented me from having to be clothed in sunglasses the whole time.  ;P


I made this outfit almost a year ago, but it never found its way into a photo shoot until just this past week.  The skirt is made from some glorious fabric we bought at Hancock ages ago - it is a perfect weight for skirts, and doesn't wrinkle much at all.  I used Vogue 9000 to make it, this time making it as full as the pattern showed, unlike my polka dot dress.  I really like that pattern for a skirt, and when you have 60" wide fabric, it doesn't eat it up quite so viciously like it definitely does on 45" fabric.


As for the blouse, well, it was quite an experience!  I started out wanting to do a wacky '50s stand-up collar like this, only with the "V" in front instead of back.  So, basically, making it backwards.  Needless to say, that plan didn't work out so well....at all, so I was left to come up with a new plan for my freshly cut-up blouse.  Finally I decided to try drafting my own collar - I don't really know where I came up with the idea for the shape, but I followed this tutorial for how to draft it, and found it to be extremely helpful!  I did the partial roll version, and it lays quite nicely.


I used a '30s Playtime print for the bodice of the blouse, and some pink polka dot from the Windham McCall's collection, I believe it was, for the contrast.


If the truth were known, almost every '50s garment would probably be better with winged cuffs, so I had lots of fun putting them on this blouse.  ;)  I used the cuff from Butterick 6018 as a guide, altering the shape a little bit.


  I really like these particular cuffs because they actually stay stiff and pointed on their own, even after repeated washings, without having to be tacked together.


I can't remember for sure which pattern I used for the bodice of the blouse, but I believe it may have been Simplicity 2154, with added kimono sleeves and a different neckline, of course.  


Since the greenery outside is not exactly green these days, and we found our favorite wall at the train station turned into a parking lot for the day, we decided to try a good old-fashioned train track photo shoot.  ;)  No trains came by while we were at it (thankfully....haha!), so I think we can call it a success.


This hat is a favorite of mine, even if it isn't in the greatest condition - we found it at a local antique shop last year for a song, and it is just a lot of fun to wear!  Plus it stayed on all day long on a windy day, so now I like it even more!  ;)


Thanks for stopping by and putting up with my irregular blogging schedule!  ;)  Have a lovely weekend!

Follow Me on Pinterest