Hello, faithful blog readers! I hope you all are doing well, and are enjoying this roller coaster of a year so far! Time seems to pass by faster and faster with each month and year that goes by. Every year or so I poke my head out and let you know what quirky new things our family is up to.

I actually drafted this post in December, so a few edits were already necessary! It’s been a whirlwind start to the year, but there are really great things in store for our family, and I’m excited to share! If you’re not in the mood for my ramblings on non-toxic household stuff, you can scroll down towards the end of the post for some sewing updates ;)
So, what have we been up to? Continuing our journey towards living healthier, both in food as well as our home. Every time you feel like you’ve plateaued a bit, you discover some new earth-shattering revelation. It’s quite the change to take on new habits and the like, but it really wouldn’t be an adjustment at all if we were all eating and living the way God intended! No one was meant to wear plastic, eat chemicals, smear their body with hormone-altering fragrances and such. But many of these products offer irreplaceable “convenience” that in turn demands somewhat of a sacrifice if you are to make the change. But again, we weren’t meant to “nuke” our food and have it hot ‘n’ ready in 30 seconds. We weren’t meant to be able to store perishable items for years on end. With those “conveniences” comes great sacrifice to our health, a much greater sacrifice than that of forgoing said conveniences.
All that to say, we’ve made a fair number of discoveries since my last “health nut” post. I’ll share some of them here, and a few links for those of you that are interested, in no particular order. (Amazon, White Rose Linen and Azure links are affiliate links).

One of the biggest changes, which we have not even been able to enjoy yet due to it being on back order - is a grain mill! I enjoy listening to the Simple Farmhouse Life podcast, and recently Lisa interviewed Sue Becker, a food scientist who is an expert on all things flour vs. whole grains. My mind was blown after hearing what she had to say, and we immediately ordered a grain mill. I had no idea of the benefits of fresh whole grain over commercial flour - even organic types, such as what we use. Do give that episode a listen, I know you’ll find it very interesting! We ordered a Mock Mill, and I have been utterly thrilled with it. It is so easy to use, and transitioning to baking and cooking exclusively with whole grains has been quite seamless, thanks to this amazing machine!

My sweet husband got me a beautiful forest green Ankarsrum stand mixer for Christmas, and I am *in love*. It is a beast, but a gorgeous one, and I've been having a blast breaking it in with all sorts of delicious treats. I've been accustomed to kneading all my breads by hand, so this lovely little machine feels like absolute luxury!

Liquid hand soap - this stuff smells amazing, goes far, and is a clean product!
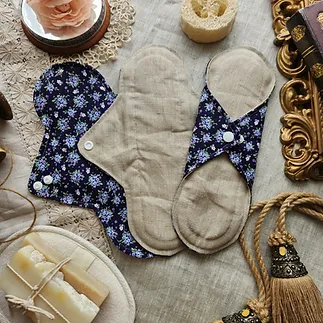
White Rose Linen feminine products. I made the switch a few months ago from organic cotton to these, and have seen a huge improvement in flow, etc. They’re very soft and pretty, as an added bonus!
Even if you’re not ready to make the move for cloth, *please* make the switch to organic cotton! Both myself and another family member made the switch from standard products to organic cotton, and immediately saw results. I had terribly heavy periods ever since having our second child, but switching to organic cotton products brought it back to a more normal flow at long last. I’ll link the standard pads, overnight pads and tampons that I found worked well.


Icebreaker Siren Merino Bra. I’ve had these for months and couldn’t be any happier. They’re mostly merino with a pinch of nylon and spandex, so they fit great but also stay fresh for so long. Wool is the bomb!!

Azure Standard organic foods! If you haven’t heard of Azure, it is a co-op, with no cost or strings attached to signing up. You simply pick a drop location near you, purchase items, and they are delivered on a semi to your drop location on a specific day each month. If you’re lucky like us, your drop coordinator will hold your items til you can conveniently pick them up, so you don’t have to meet the truck. We have been thrilled with the Azure products we’ve ordered so far - flour (and now we’ll be ordering wheat berries), einkorn pasta, raw milk cheese, vanilla, fresh produce, cocoa powder, etc. Do check them out! Most items are a competitive price with your average grocery store organic items, some are lower, some are slightly higher. But it averages out to be as cheap as the store, and it’s so convenient to be able to pick everything up at once.

Hello Bello diapers - I haven’t decided yet between them and the brand linked below. Both perform well.
Pura diapers - way softer than Hello Bello, and very absorbent as well!

Klean Kanteen sippy bottle - these are free of any heavy metals/toxic substances per a Mamavation study. Our kids have had them for just shy of a year and they’re holding up beautifully, despite being dropped…. a lot.

Enjoy Life chocolate chips - who knew that chocolate chips didn’t need soy lecithin (hello, hormone disrupters) and other additives! Three ingredients. Count me in!

Truly Free laundry soap - smells amazing but non toxic.

Grove toilet paper! TP is yet another surprising item that is super bad for you, and here we are coming in very close contact with it, all day, every day. This toilet paper is free of all the nasty stuff, and works great!

Piggybacking off of the TP subject, you need a bidet. Just trust me on this one. It’s such an odd concept until you’re accustomed to it, and then you’ll hate leaving your house and having to live without it!
---
Moving right along onto less odd topics!
I'm so excited for spring, and have been since before Christmas! Over the past 4 years, I've come full circle from being completely over trying to have huge gardens (huge for the size of our town lot, that is), keep chickens, can, etc, to being ready to till up the one garden plot that we had turned back to turf, and ready to hit the "order" button on a beautiful aluminum chicken tractor! A huge part of that reason is definitely due to the fact that our kiddos are now at a very different stage and are not screaming around the clock, nor am I enormously pregnant and trying to pick unnatural quantities of beans and can them on a hotplate, 6 jars at a time. Not that I'd know anything about that....
But also, with the way we've been slowly transitioning into a more natural lifestyle, eating whole foods, and watching what we are putting into and on our bodies, I am so ready to make the most of what we can produce and preserve from our very own gardens.
I'll definitely share our garden plans, or at least the results thereof here on the blog! I still need to finalize my plans for the vegetable side of things, but I do know I want to utilize an empty space along one side of our house to grow some gorgeous "pickable" flowers (zinnias, delphinium, small sunflowers), as well as a few select herbs! I can't wait to enjoy the beautiful blooms all summer long, both inside the house and out.
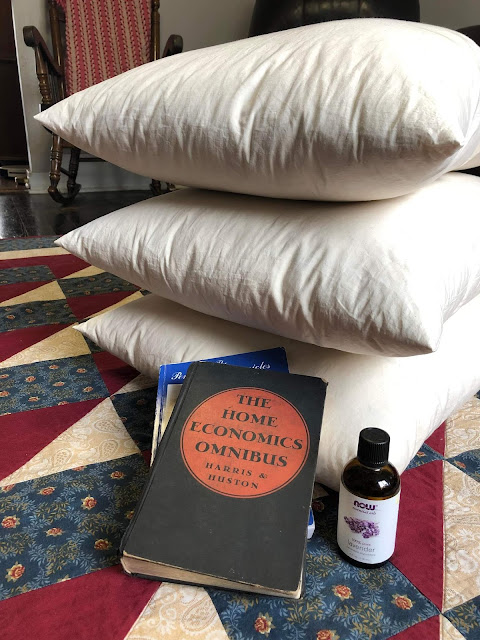
On the sewing front, I have actually done a *ton* of sewing recently! My hubby has been working some odd shifts, so after seeing him off at various hours of the night, I stay up and work on whatever task is at hand, which for a couple of months was sewing! It felt absolutely amazing to dig in and get a number of projects completed, including all of the winter dresses and nightgowns I had planned for our daughter, two pairs of overalls for our little boy, conquering the years-long mending pile, and even finishing my Mother’s Day dress! I’m all excited to keep going, but with a caveat due to some recent changes we made in our home. But more on that in a moment First, a glimpse of the afore mentioned sewing projects!


Well, this post ended up being even longer and more rambling than I intended! If you made it to this point, I do appreciate it!! I hope you’re having a lovely start to the year! Do leave me a comment and let me know what you all have been up to!
♥ Esther