Showing posts with label dress. Show all posts

Monday, October 20, 2014

• 1950s Favorite Fall Dress •


Months ago, I saw this fabric at JoAnn and fell in love with it. I ended up only getting enough for an apron and just loved it. A few months later, Lily of Mode de Lis posted about her fall dress, which happened to be made of the same fabric. I knew I had to have one like it. I was thrilled to find that JoAnn still had it in stock when we went back!


Since the neck had to be higher anyway, I decided to substitute a slightly different collar using Burda 7179. The collar isn't as big as the Simplicity pattern, but I still like it.
The only other alteration I made was making the sleeves less fitted. I love this dress!


The fabric called for big buttons, so these waffly ones fit the bill perfectly. 


I have been on the hunt for more vintage shoes, and found these online from DSW. They are leather, which makes them quite comfortable, and they have wooden heels! (very vintage)
This hat was my first vintage hat purchase ever from a local antique store.


My mom and I went out for a photo shoot in our matching fall dresses. It was such a beautiful day, we just couldn't resist going over to the nature preserve for some pictures. We got a few strange looks from passers by as we walked through the woods in high heels and petticoats.
Hop over to her blog to see more pictures.


Thanks for visiting!
Thanks for the great photography, Mom!
Visit the blog live to leave a comment

the end.
.


Follow Me on Pinterest

Thursday, March 20, 2014

Butterick Walk-Away Dress

**NOTE**
I have remade this dress since posting this review; see the new version here.


The dress is Butterick B4790, a wrap dress that is very simple to make, having no buttonholes, interfacing, zippers, or lining. It was a bit time-consuming, because I sewed the hem and the seam binding by hand.
I ended up finishing it at about 12:30 Saturday night (aka Sunday morning). I was determined to wear it to church Sunday morning, even if I had to stay up all night to do so. Overall, this was a pretty easy dress to make. I'm very much of an amateur at following patterns, but this was a breeze. And, I am no longer scared to death of seam binding! (hurray!)
Here's a few pics.

Front view


Back view

The front wraps around to the back and closes with a button and loop.


The back wraps around to the front and closes with snaps...

Topped off with cute vintage buttons. I nabbed 10 of them at a local antique store for $4.

I sewed the long edge of the seam binding on with the machine, then sewed the short edge down by hand with a whip stitch. I love the effect - you don't end up with skewed, uneven seams this way.

I serged the hem and whipstitched it, turning under by hand as I went along.


Thanks for visiting! I hope you're enjoying the (almost) spring weather.

Follow Me on Pinterest

Monday, March 17, 2014

Vintage Sewing Link Party #1


Hi there and welcome to the very first Vintage Sewing Link Party! I absolutely love vintage style clothing, and have made a resolution to sew myself a whole wardrobe of it! I am so glad you are here to join me in this little adventure. I would love to have you link up your vintage style sewing and craft projects and outfits!
I haven't taken pictures of my new dress yet, but I will be doing so tomorrow. Meanwhile, here's a snapshot of it to hold you over!


I love how it feels and looks, and I love having my first vintage-style piece of clothing made and in my closet! I'll be posting a full pattern review with the pictures.


My next vintage sewing project is this blouse, but I'm going to modify it and add longer sleeves and a button back instead of a side zipper. I can't wait to see how it turns out!

And now, for the link party!!
A few rules:
Family-friendly content only, please.
Only link up the same project once.
Please add the link party button to your blog.
Visit another link and leave a lovely comment.
And last but not least, enjoy yourself and come back soon!


Follow Me on Pinterest

Saturday, March 8, 2014

Vintage Wardrobe Challenge: Butterick B4790

~~~~~~~~~
Welcome to my first Vintage Wardrobe Challenge post! My goal is to have a wardrobe that consists mainly of handmade, vintage style clothing, so I thought a sew-along would be just the thing to do! You can sew your own version of the dress, then show it off at the VWC link party (starting next week).Vintage style clothing is so pretty, and there are alot of patterns available in modern sizes. 

Today's VWC project is Butterick B4790. It is called the "Walk-Away" dress, because ideally, you could start the dress after breakfast, and walk away wearing it by lunchtime. That isn't really going to happen because you have to let it hang for 24 hours before hemming. In any case, it is pretty much the easiest dress you'll ever make. No interfacing, no buttonholes, no zippers. What could be better? 
So grab your pattern, some fabric and start sewing! You can purchase the pattern at your local fabric store. I bought 7 yards of a floral cotton. There is about 33" leftover. I did, however lengthen the dress 6" to make it long enough for me (keep in mind I'm 6‘)
I currently have my dress hanging up to set the hem. Next I will be serging and hand stitching the hem. The directions say to hem it on the machine, but I like the hand-stitched effect. It is going to take forever, I realize that, but I don't mind it.


Link up your project at my Vintage Sewing Link Party!
Happy sewing!
Follow my blog on Bloglovin by clicking the link above on the right, or enter your email address to have posts delivered straight to your inbox.


Follow Me on Pinterest

Friday, November 15, 2013

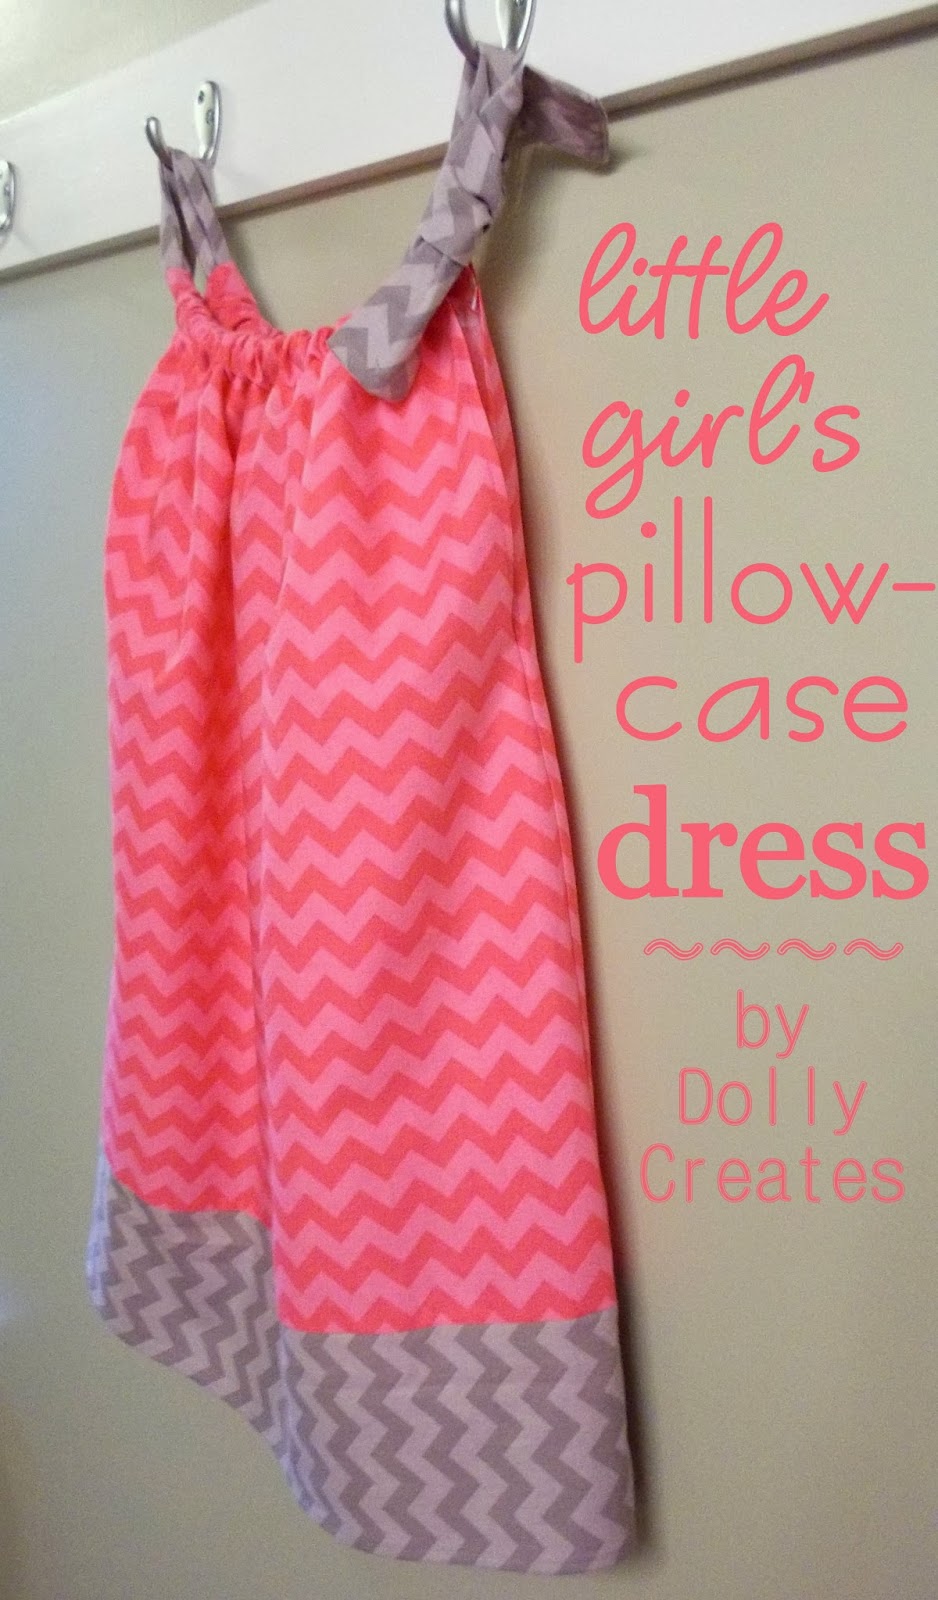
Little Girl's Pillowcase Dress


 So....I really wanted to make some sort of piece of clothing for a kid, BUT I needed something fast and easy. 
Out came the Little Girl's Pillowcase Dress! It's super cute, super duper easy, and it's really fast to make. 
I apologize for the horrible strange quality pictures. The lighting was bad, 
and I had the color vibrancy turned up from a previous photo shoot, so it totally was too bright with all that pink chevron. Oops!!
Since I don't have a little girl to model for me, the pictures don't do this lil' dress justice, but it is seriously cute. 
You can make this in pretty much any size you want just by lengthening, widening, etc.
UPDATE: If you make the dress the size I did, it will fit anywhere from a 3-5 year old, depending on how long you like to have dresses. I prefer them to be below the knee, in which case this would be perfect for a 3-4 year old.
Note: I say "serge or sew" in some places in this tutorial. I serge because we have a serger, but if you don't, just sew the seams at about 3/8". 
I used Riley Blake chevron in gray and pink, with the gray going vertically, while the pink is horizontal.
To begin:
Cut out the pieces as follows:
2 main body pieces: 20 1/2" x 23 1/2" each
2 hem pieces: 4 7/8" x 23 1/2" each
1 neck-tie piece: 3 7/8" x 43"

Iron under the bottom edge of your hem pieces 1/4". Iron under again.
Make sure you treat the selvage (finished ~ NOT cut) edges as the top of your main body piece.
Iron under the side arm seam about 1/4", down to 10 1/2" from the bottom as shown in the picture. Iron under again.

Sew the hem on your bottom hem pieces right next to the edge as shown in the picture below.

Sew the arm seams right next to the edge, like you did on the hem pieces. I found that it was easier to start on the <--- bottom of the armhole, ending at the top. (Yes....my seam is shamefully crooked. That's what happens when you hurry. Don't hurry. Or you end up with a uh...shabby chic seam, as I like to call it.)

Serge or sew each hem piece to each main piece with right sides together, making sure you are sewing the raw edges together, not the hemmed edges!

Serge or sew the body pieces together, with right sides together, matching up the bottoms exactly. Start on the bottom, ending at the armhole seams. Just veer out to the edge once you reach the armhole seams. It's a lil' tricky, but you can do it. 

Iron under the top of each main body piece about 1 3/4".

Sew the seam about 1/4" or so from the edge, as shown. 

Serge or sew the neck-tie piece, with right sides together, leaving one end open.

Turn right side out and press out the seam with a metal ruler, or some un-melty object.

Feed the end through your body piece, and DONE! Hooray! Now to ruin your day: tie the ends and feed them through the fabric. I know. It's really not fun. Once you're done though, it's super rewarding.
~~~~~~~~~~~~~~~~~~~~~~

~~~~~~~~~~
Thanks so much for stopping by! Check back again soon for more cute projects. You can subscribe by e-mail or on Bloglovin above on the right. Follow me on Pinterest by clicking this link.
Follow Me on Pinterest