Showing posts with label Tutorial. Show all posts

Friday, January 12, 2024

• How To Make Your Own Down Bed Pillow •


A few years back, my husband had the idea to buy some bulk down so I could make some pillows, vests, and a comforter.  When I went to make the pillows, upon looking for tips and tricks for how to do so, I found there is virtually no information or tips about it online.  So I decided to write up a blog post about it for anyone else who might want to make their own as well! 

It only takes a short time to whip these up - I seem to recall getting all four pillows stuffed and sewn shut while my daughter was taking an afternoon nap.

You will need:

- Down proof ticking.  I purchased mine here on Etsy.  This is not the standard striped ticking that comes to mind when you think of pillow ticking, this is a thicker fabric that is specifically woven to keep all those feathers inside! This particular fabric is very nice, heavyweight but feels great and would even work well to make throw pillows.  

- Bulk down!  We purchased ours here on Amazon, in the 80/20 blend.  For one pillow, you will need 2 pounds of down. (See more about the weight later on in the tutorial)

- Thread, and a sewing machine

- A large bowl

- Scale

- Pins

- Lint roller (to get those pesky stray feathers)


To begin, cut your ticking into a long rectangle, 57.5” x 21” (for a standard size bed pillow).  


Fold the fabric in half, lengthwise, matching up the edges.


On the short end (where we will leave the opening), fold the edges of the fabric over to the outside 1/2" like this, and pin:


Sew the two long edges shut, using a 1/2" seam and a very short stitch length (I would recommend about half of your typical stitch length, as we don't want the feathers to escape!). 


Next, feed the pillowcase onto your ironing board, and first press the side seams flat.  


Then, press the opening raw edge over 1/2" to line up with those edges that you sewed!


Now, we are ready to fill the pillow!  For this step, I highly recommend setting up outdoors if possible, as the feathers do like to fly.  I set up a little table on our front porch (in town, yep!  All the neighbors already know I'm weird...) and stuffed them before bringing them in to sew shut.


First, tare your scale for the weight of the bowl + your pillowcase.


To begin filling the pillow, I stuck the pillowcase down into the box and tried to fill it as carefully as possible, because if you take a handful of feathers out in the air, it will make quite the mess.


Grab handfuls of the fluffy down, and begin stuffing away!  It doesn't take too long, but it definitely will take more feathers than you initially think to fill the pillow.


Once you think you have enough, throw it on the scale and check!  I used 2 pounds of down for our well-stuffed pillows, and I believe about 26 ozs for slightly less robust ones.


Once you have sufficiently filled the pillow, pin it shut carefully, making sure to line up those pressed edges.  


Sew across the entire opening, using the very small stitch length, and backstitching at the ends!  You may also wish to sew the entire seam a second time to reinforce it. 


It can be a bit of a wrestle to fit it under your machine, but it is very doable.


Once you've finished sewing, you may remove the pins, give it a once-over with the lint roller, and you're ready to go!  


You may experience a bit of feather loss over time - not that your pillow necessarily feels smaller, but you may just get an occasional poke in the neck from those pesky quills.  One thing I can recommend to alleviate that is a pillow protector like this one.  I have also just doubled up on pillow cases, and it seems to work quite well. 


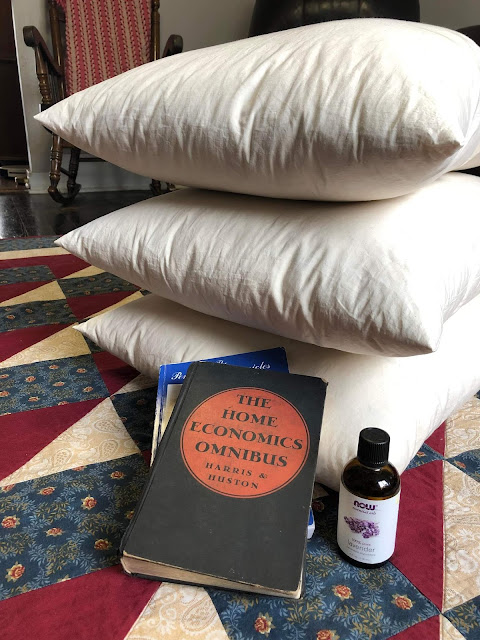
We have been using our pillows for about a year and a half now, and love them as much as (or more than!) the very first day.


I hope you've enjoyed this tutorial and found it to be helpful!  Let me know in the comments if you've ever made a down pillow before!


Have a great weekend, friends!!

♥ Esther


Follow Me on Pinterest

Wednesday, April 27, 2016

Tutorial • Kimono Sleeves


Today I am sharing a tutorial that I have been wanting to post for quite a while! The dress in these photos is almost completed and will be photographed soon, but for now I wanted to share part of the construction of this dress; our method for finishing kimono sleeves. 

I have seen several different ways of finishing them; in the past I have simply serged the edge after stitching it. and then clipped it (which just resulted in the serging coming apart), or clipped the edge and then topstitched on each side of the seam afterwards. The method I'm showing you today seems to work the best for us, however, and keeps the raw edges doing what they are supposed to; staying put! ;)


First of all, you want to sew your underarm seams on each side, leaving a left side opening for a zipper, if applicable. My seam allowances were 5/8". It is hard to see the stitching since the thread happens to match so well! Should have used red thread! ;)


After you stitch the seam, clip the seam in the underarm area around the curve.  


I made about 6-7 clips, clipping from the sleeve end around the curve to the straight side seam ege. Clip to within 1/8" of the seam. 


Now you are going to serge the underarm seams!

Starting with the zipper side (assuming you have one; if not, you're getting off easy!), open up the seam so that you are serging only one layer of fabric at a time. When you start on the sleeve edge, serge very closely to the seam, as shown in the left picture. When you get to the underarm curve, "pull" your seam out straight so that the clipped area is spread apart. Serge very close to the seam so that even the clipped areas are contained within the serging. Serge around the curve, and as soon as you are past the clipped areas, angle back out to the edge of the fabric so that you still have your full 5/8" seam allowances for the side zipper.

Repeat for the other (left side) seam allowance, starting at the waistline edge, and angling inward as soon as you get past the zipper opening.

For the right side seam, serge both layers of fabric at once, serging very close to the stitching line as with the other seam, pulling the underarm curve out straight, just as before.


And....voila! You have a beautifully (and easily!) finished underarm seam!


Close-up view.


View of the zipper side.


Then you will press your seams from the outside. 


Perfect curves, and a nice finished edge inside. :)


Credit for this method goes to my mom; she first discovered it  when she was making this vintage baby bathrobe. Since then we've used it on every single kimono sleeve seam, and it works like a charm!


(Please forgive my selvedges....they got trimmed off, don't worry!) ;)


I hope you enjoyed the tutorial, and that it made sense! Please let me know if you have any questions! 

I'll be back next week with photos of this dress. Stay tuned! :)
Follow Me on Pinterest

Friday, June 12, 2015

• Keyhole Tutorial •


Hurrah! Hurrah! I'm finally posting the long-awaited keyhole tutorial!
Every time I wanted to photograph the making of a keyhole on a dress I was sewing, I ended up doing something differently or being in too much of a hurry to be able to do so. But my current sewing project (a gorgeous striped 1940s dress) ended up being the perfect opportunity to photograph my keyhole-making method.


You will need the back bodice piece of what you're sewing and a back facing piece to match. Interface the back facing piece and finish the bottom edge.


You'll also need a bias-cut loop piece measuring 1" x 1 3/4".


Sew the loop with right sides together, stretching it as you sew and keeping the folded edge even with the edge of your presser foot. You may want to backstitch just a couple of stitches as you start so you have a secure thread tail to pull later.


Once the loop is sewn together, use a big-eye needle to pull the starting-end thread tails through the loop and turn it. Press the loop piece and shape it into a loop.


Mark the center line of your back facing piece on the interfaced (wrong) side. Mark how long you want your keyhole to be (mine is 4 1/2" long) and make a dot on either side of your center line at the bottom end, almost 1/8" away on each side.


On the neck edge, mark a little line to note where your seam allowance is. Mine is 3/8", but be sure to read your pattern to see what yours should be. Make a dot 1/4" away from the center line on each side, even with your seam allowance. This is where you will pivot when you sew the keyhole.


Now, using a ruler, connect the dots!


The next step is to baste the loop onto your back bodice piece (see note below), having the raw edges even with the center line, and making sure the top edge of the loop is close to but not over the seam allowance. The picture above illustrates where your loop is.

Note: As I was sewing my keyhole, I kept getting the feeling that I was forgetting something. I was. I completely forgot to baste my loop onto my back bodice before sewing the keyhole together! Fortunately, it doesn't require much unpicking when you do that, so I was able to fix it quite easily. However, it's always best to do things the right way, so...don't do what I did! ;)


Next, pin your facing onto the bodice and start sewing!


When you reach the first dot at the top of the keyhole, pivot and start down your marked line.


When you get to the bottom, pivot on the dot again and change your stitch length down to about 2 (smaller than you have been sewing). Stitch to the other dot, pivot, and change your stitch length back up to where it was. Continue sewing up the keyhole in the same manner.


Hurrah! You're nearly there!


Next, snip down the center line marking to the end stitches, snipping very close to but not through them. Make a tiny diagonal cut towards the corner (like you'd do on a bound buttonhole) on each side. 


Notch the curves of the neck edge and clip the corners of the keyhole edge as shown.


Fraycheck the bottom end of the keyhole, putting a goodly amount on but not so much that it runs beyond your stitching lines. Allow to dry.


Turn the facing to the inside, press, and you're done!!


Inside view. 


I'm so glad to finally have this tutorial done; I apologize for taking so long to get to it! This seems to be one of the busiest times of the year around here (hence the missed post on Monday), but it's starting to be a little less hectic, thankfully. I'll be back on Monday!
Follow Me on Pinterest