Thursday, August 29, 2013

Clothespin Apron


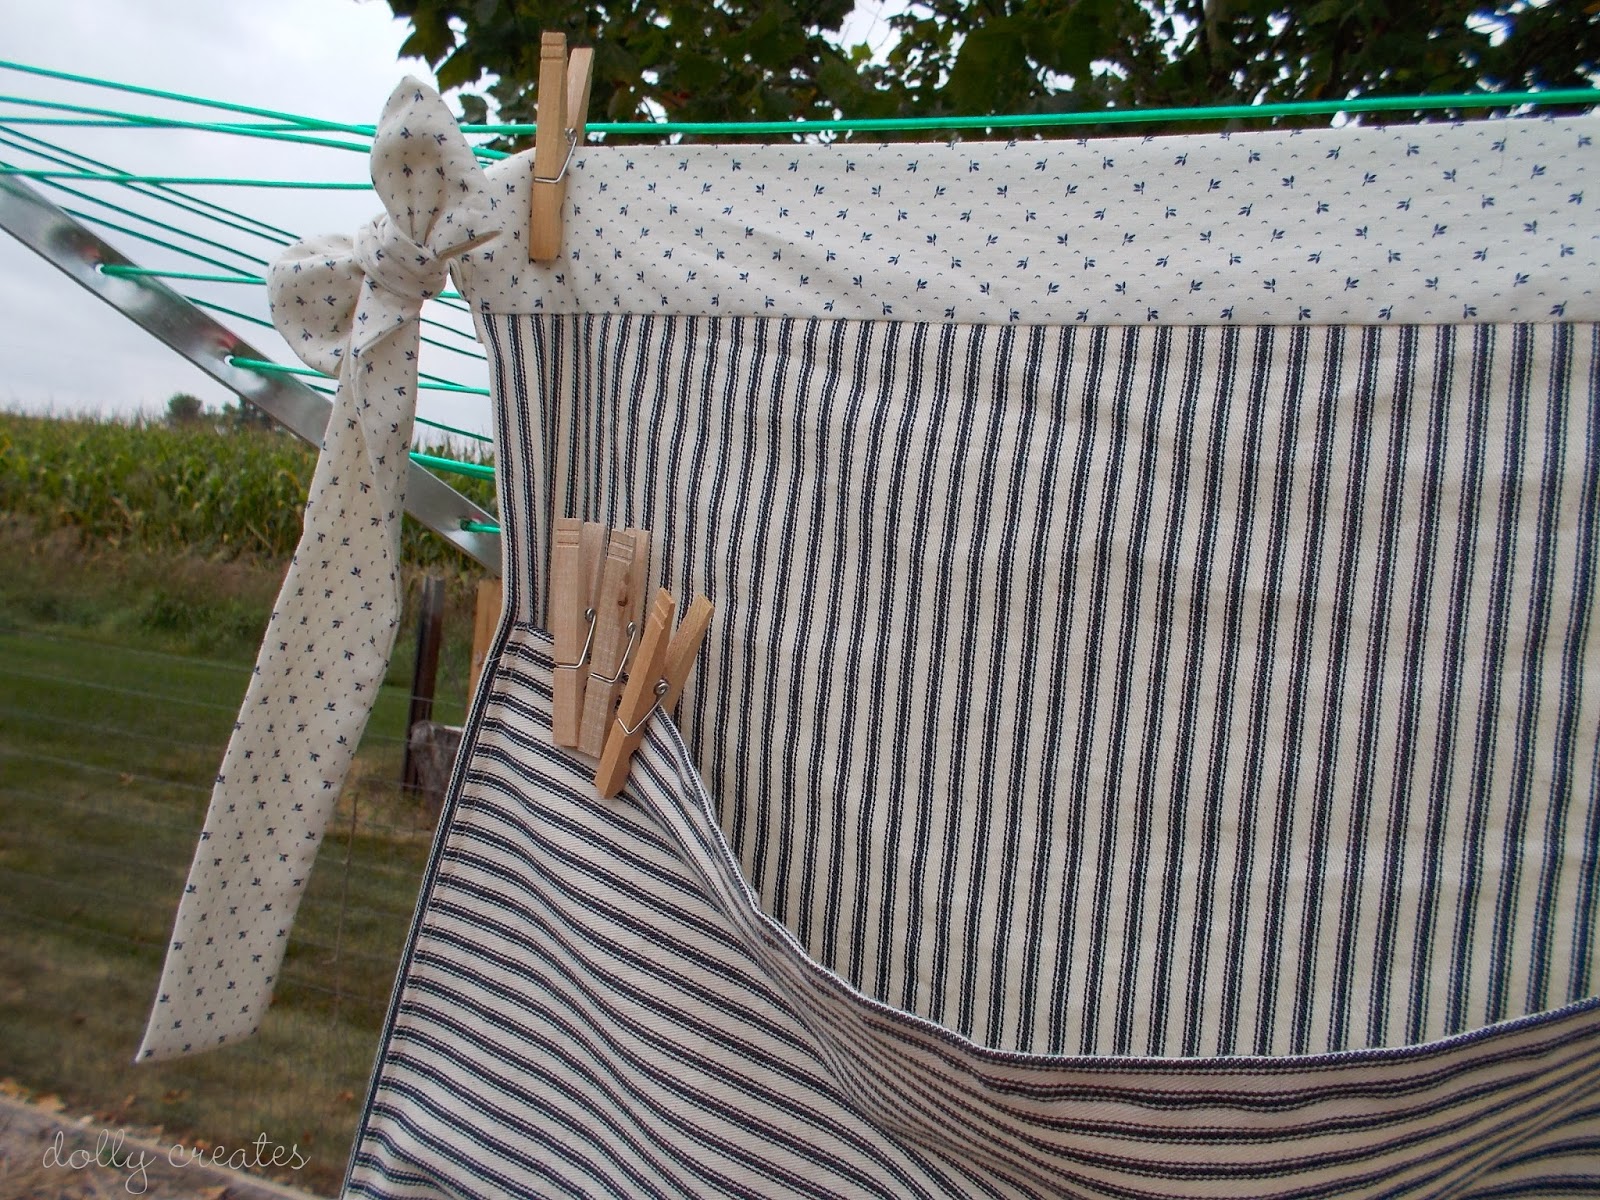
 I finally made my clothespin apron. I always wanted one out of ticking, and it happened! I got this ticking for....
better sit down....
$1.78.
Yeah.
How's that for a great price? 5/8 yard remnant at the local fabric store. Loving it!!
Super simple design - follow the same instructions for a half apron, but do not gather the waistband. For the pocket, simply iron over the four edges, hem the top edge, pin it on and sew!
Super simple. I love the idea of using ticking for a clothespin apron because it's thick and sturdy, and it's so cute too!

Thanks for stopping by!! I'd love to have you link up at my link party!
~~~~~~~~~~~~


Follow Me on Pinterest

I Made That! Thursday #6

Welcome back to I Made That! Thursday! Thanks to everyone who participated last week.

~~~~~~~~~~~~~
 
Sour Cream Pound Cake from Ann's Entitled Life.
This looks SO good! Can't wait to try it. Thanks for linking up, Ann!
~~~~~~~~~~~~~~~~~
How to Bake Banana Cake from Pursuit of Functional Home.
This looks so good too! I am getting hungry. Thanks for sharing, Judy!
~~~~~~~~~~~~~~~
"You Tell Me" by DIY Vintage Chic.
Becca is trying to decide what to do with this swing, and she wants your help!
Can't wait to see how it looks! Thanks for sharing, Becca!
~~~~~~~~~~~~~~
 
Now on to this week's link party!


Follow Me on Pinterest

Sunday, August 25, 2013

Knit Heart Dishcloth

Knit Heart Dishcloth

Yarn: 1 skein Peaches 'n' Cream
Needles: size 6 (4.25 mm)

CO 42 stitches.
Row 1: k across
Row 2: k across
Row 3: k across
Row 4: k across
Row 5: k across
Row 6: k across
Row 7: k across
Row 8: k6, p30, k6
Row 9: k across
Row 10: k6, p30, k6
Row 11: k across
Row 12: k6, p14, k2, p14, k6
Row 13: k across
Row 14: k6, p12, k6, p12, k6
Row 15: k across
Row 16: k6, p11, k8, p11, k6
Row 17: k across
Row 18: k6, p10, k10, p10, k6
Row 19: k across
Row 20: k6, p8, k14, p8, k6
Row 21: k across
Row 22: k6, p7, k16, p7, k6
Row 23: k across
Row 24: k6, p6, k18, p6, k6
Row 25: k across
Row 26: k6, p5, k20, p5, k6
Row 27: k across
Row 28: k6, p4, k22, p4, k6
Row 29: k across
Row 30: k6, p3, k24, p3, k6
Row 31: k across
Row 32: k6, p2, k26, p2, k6
Row 33: k across
Row 34: k6, p2, k26, p2, k6
Row 35: k across
Row 36: k6, p1, k28, p1, k6
Row 37: k across
Row 38: k6, p1, k28, p1, k6
Row 39: k across
Row 40: k6, p2, k26, p2, k6
Row 41: k across
Row 42: k6, p3, k24, p3, k6
Row 43: k aross
Row 44: k6, p4, k10, p2, k10, p4, k6
Row 45: k across
Row 46: k6, p5, k8, p4, k8, p5, k6
Row 47: k across
Row 48: k6, p6, k5, p8, k5, p6, k6
Row 49: k across
Row 50: k6, p30, k6
Row 51: k across
Row 52: k6, p30, k6
Row 53: k across
Row 54: k across
Row 55: k across
Row 56: k across
Row 57: k across
Row 58: k across
Row 59: k across
BO and weave in ends.Follow Me on Pinterest

Saturday, August 24, 2013

DIY Mercury Glass Candleholders


Yay!! I made mercury glass candleholders! I saw a tutorial for these in a magazine, and just couldn't resist. Here's the good part: I got the candleholders at Dollar Tree, so they were only $1 each!! The mirror paint is Krylon brand - you can get it anywhere that sells paint. It's a little bit pricey - $6.84 or so per can, but it's totally worth it. I got the candles at Meijer - 2 for $3!! Can't beat that!
How-to:
All you have to do is spritz the inside of the candleholder with water, and then spray it with paint. Set it upside down on newspaper and let it dry. Repeat 2-3 more times, or until you get the desired effect. You may want to set it upright one of the times while it's drying so the "watermarks" aren't all traveling upwards. 
It's as easy as that! They would make great gifts as well, and they're definitely a cheap way to make something neat! I've seen them at different places for anywhere from $5-$20. 

Thanks for visiting! I'd love to have you comment and follow my blog. There is a button on the right-hand side of the page to follow on Bloglovin', or to follow by e-mail. Thanks!
Check out my new "About" page above on the left. 


Follow Me on Pinterest